| This guide walks instructors through using the SchoolSpace LTI 1.3 integration inside Canvas to create events, manage worlds, and view recordings. Before you can use LTI 1.3, you'll need to set up the integration in Canvas. |
Keep reading to learn about:
![]() Canvas Integration Capabilities
Canvas Integration Capabilities
![]() Accessing SchoolSpace in Canvas
Accessing SchoolSpace in Canvas
Canvas Integration
With SchoolSpace's LTI 1.3 integration, you can manage worlds directly in your Canvas LMS.
This integration allows you to:
- Create new worlds.
- Schedule events that take place in those worlds.
- Restricts access to worlds based on course enrollment or sections of a course.
- Join worlds from Canvas.
- Track attendance.
- View, share, or hide recordings taken during events.
- Track student engagement with recordings.
Canvas Integration Overview
To Access SchoolSpace in Canvas:
- Log in to Canvas.
- Click the Courses icon on the left sidebar.
- Select the course you want to use.
- In the course navigation menu on the left, scroll down and click SchoolSpace.

- Once opened, you will see your course name at the top along with four tabs:
- Events: View upcoming events and create new events. Visible to students and teachers.
- Past Events: View past events and recordings. Visible to students and teachers.
- Recordings: View all recordings and choose to show or hide them from students. Only visible to teachers.
- Worlds: View worlds created in Canvas for this course and create new worlds. Only worlds generated in Canvas will appear here. Only visible to teachers.
Managing Events
Upcoming events and newly created events will appear in the Events tab. Past events will appear in the Past Events tab.
Learn how to:
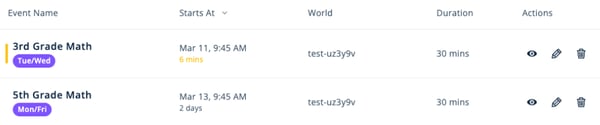
Each Event will display:
- Event Name
- Start Time
- World
- Duration
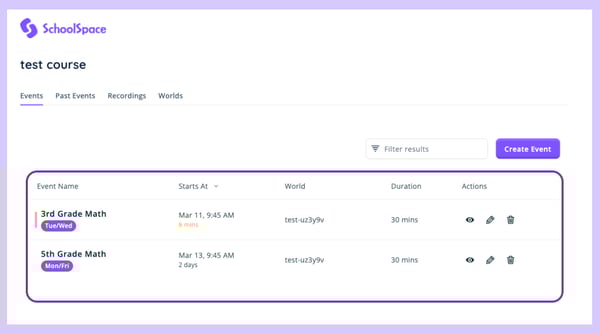
When it is time for the event, a Join button will appear. Click Join to enter the event.
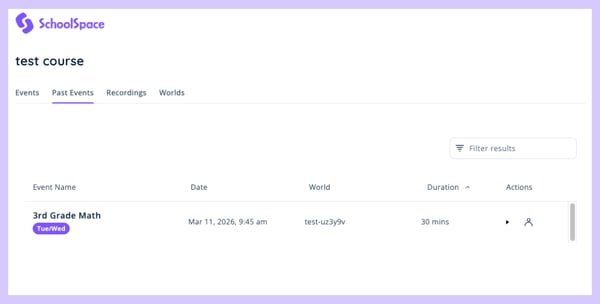
Each Past Event will display:
- Event Name
- Date
- World
- Event Duration
- Student Attendance
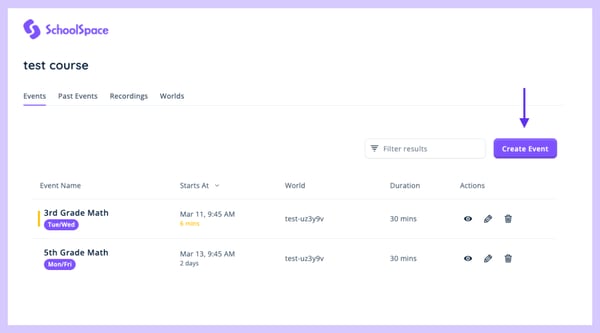
To Create an Event in Canvas:
-
Navigate to the Events tab.
-
Click Create Event.
-
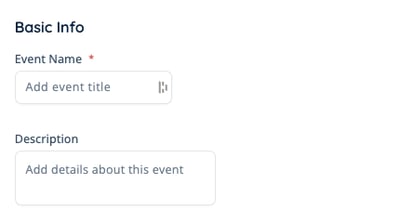
In the Basic Info section, add:
-
Event Name: The title of your event.
-
[Optional] Description: Any details you want to include.
-
-
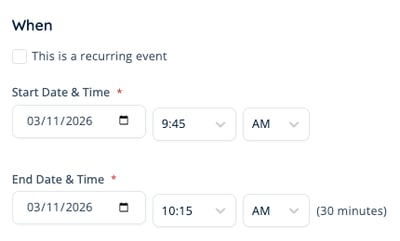
In the When section, add:
-
Start Date & Time.
-
End Date & Time.
-
[Optional] Recurring event: Check the box to create a recurring event. The event will automatically repeat every weekday at the selected time.
-
-
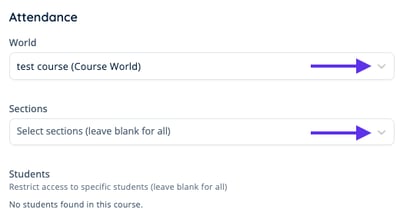
In the Attendance section, select:
-
World: The World where the event will take place.
Note: If you do not see any worlds in the dropdown, close out of the event, and switch to the Worlds tab to create a world. Only worlds created in Canvas will be available in this dropdown. -
Sections: Restrict the event to specific students or leave this blank to allow all students in the course to join.
-
-
Click Create Event at the bottom to save.

To View and Join an Event:
-
Navigate to the Events tab.

-
Each event will display:
-
Event Name
-
Start Time
-
World
-
Duration
-
-
In the Actions column, you can:
-
 View event details.
 -
 Edit the event.
 -
 Remove the event.
 -
Join the event. When it's time for the event, a Join button will appear. Click Join to enter the event.
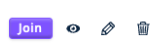
-
-
When you click Join, the preselected world will automatically launch in a new browser tab, allowing you to enter the world.
Students are able to view event details and join an event. Students are not able to edit or delete an event.
To Access Past Events:
-
Navigate to the Past Events tab.

-
Each past event will display:
-
Event Name
-
Date
-
World
-
Event Duration
-
Student Attendance

-
-
In the Actions column, select:
-
 Play to view a recording of the event.
 -
 Attendance to view attendance or export attendance as a CSV.

-
Managing Recordings
Any recordings created during an event (in both Explore or Gallery Mode) will appear in the Recordings tab.
For each Recording, you will see:
- Recording Name
- Event
- World
- Date
- Recording Duration
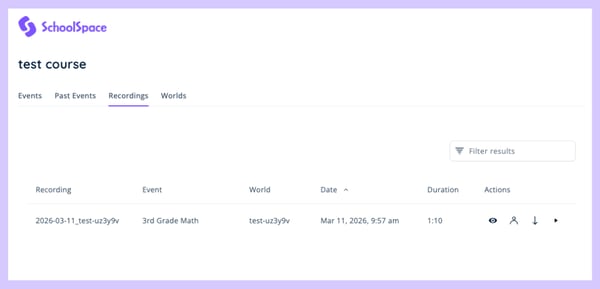
To Access Recordings:
- Navigate to the Recordings tab.

- In the Actions column, select:
- Show or Hide the recording from students.
- Attendance to see recording activity.
 Download to download a mp4 file.
- Play to watch the recording directly in Canvas.

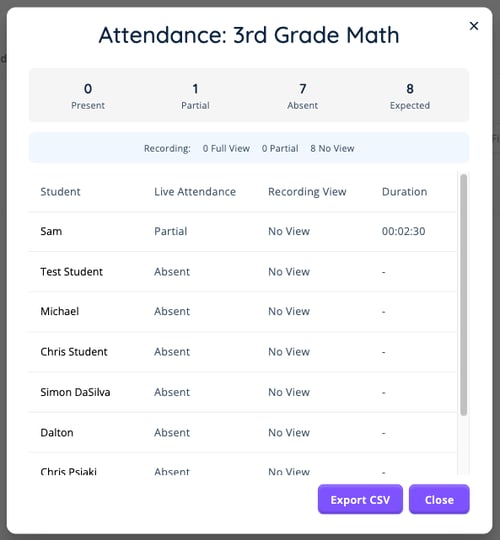
- Teachers can view or export recording activity by selecting Attendance in the Actions column. This allows you to track both live participation and recording engagement. When you select Attendance, you will see:
- Student: The student's name.
- Live Attendance: Who attended the live session during the recording.
- Recording View: Who has watched the recording.
- Duration: How much of the recording each student watched.
Managing Worlds
Under the Worlds tab, you can create and launch worlds at any time. World generated in Canvas can only be accessed via Canvas. To give students access to a world in Canvas, create an event that uses the world and choose to invite all students in the course or a specific section.
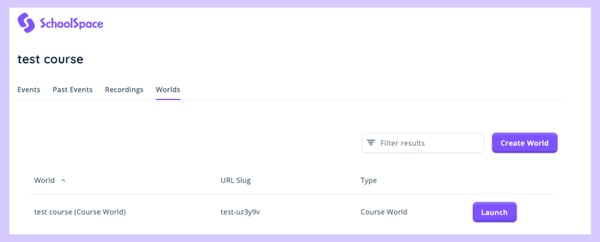
The only worlds you will see on this list will be worlds that you have generated through Canvas. All other SchoolSpace worlds will not appear on this list.
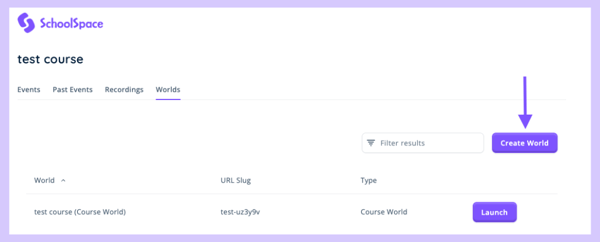
To Create a World:
-
Navigate to the Worlds tab.

-
Click Create World.
-
Choose a template for your world.
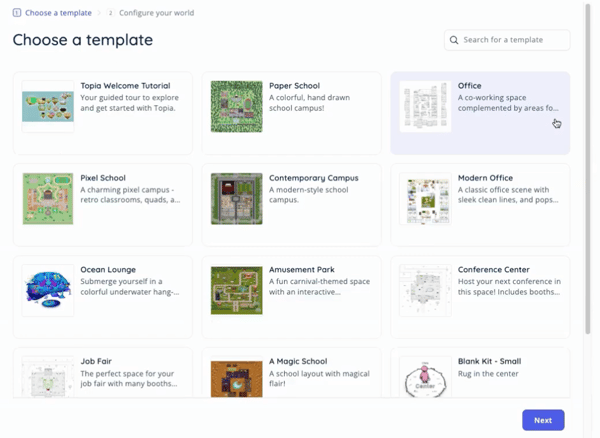
-
Click Next.
-
In the World Details section, add:
-
World Name: Give your world a recognizable name (e.g., Ms. Smith's 3rd Grade Math Room).
-
World URL: Choose a URL for your world. The text entered here appears at the end of the URL. We recommend the following format: school-yourName-class (e.g., schoolspace.io/riverside-smith-algebra).
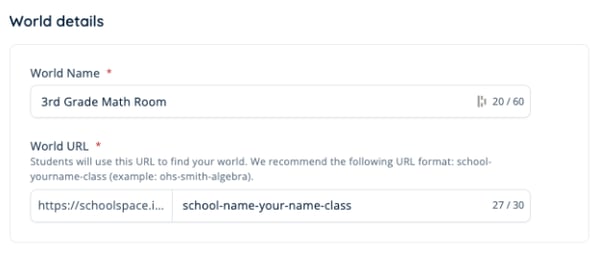
-
-
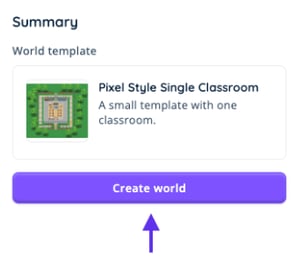
Click Create World.
-
Your new world will now appear in the Worlds tab where it can be launched. To give students access to the world, create an event that uses the world and choose to invite all students in the course or a specific section.