| This article explains everything you need to know about using the Asset Library to customize your virtual campus. It covers how to access the library, find what you need, and drop an asset in the world as well as different views available to you. |
Keep reading to learn:
![]() How to Search the Asset Library
How to Search the Asset Library
What is the Asset Library?
The Assets Library is your central place in SchoolSpace to find ready‑made items (called “assets”) you can arrange in your virtual campus. Only Editors, Designers, Managers, and world Owners can access the Asset Library.
Assets in the library can be grouped by:
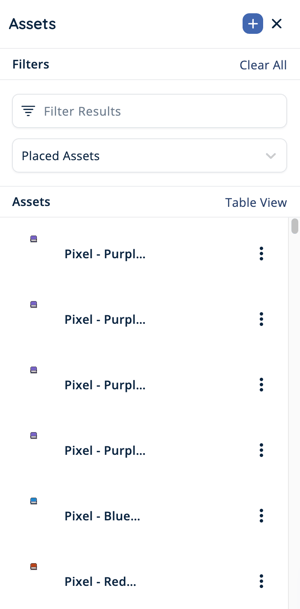
- Placed Assets: All assets currently in the world. This option is selected by default when you open the Asset Library.
- SchoolSpace Assets: Assets available in the main library. Use this to find new assets when editing a world or building from scratch.
- My Assets: Custom assets you have uploaded.
- All Assets: Allows you to search all the above groupings.
Moderators do not have access to the Asset Library unless they also have Editor or Designer permission.
What is an Asset?
Assets are the building blocks of your world and are crucial to the look and feel of the space you want to create. Every image you see in a world is an asset. They can be simple like a rectangular platform or artistic like a weeping willow tree. Once you've built your world, we recommend saving the world as a scene.
To Open the Asset Library:
- Click Builder Mode
 in the left sidebar or press B on your keyboard to enter Builder Mode.
 - Click Assets
 in the left sidebar.
 - The Asset Library will open in a thumbnail list view on the left side of your screen. The Asset Library is filtered for "Placed Assets" by default.
To Search or Filter Assets:
- Open the Asset Library.
- In the Filters section, change the dropdown to fit your needs:
- Placed Assets: All assets currently in the world. This option is selected by default when you open the Asset Library.
- SchoolSpace Assets: Assets from the main library.
- My Assets: All custom assets you have uploaded.
- All Assets: Include all of the above in your search.
- In
 Filter Results, type a keyword (i.e. desk, bookshelf, stage, etc) to find assets quickly.
 - When SchoolSpace Assets is selected in step 2, you can also use the Filter by Category dropdown to narrow down your search.
- The Assets section will display a thumbnail list of assets that fit your search terms. From here, you can drop the asset in the world.
- You can also search while in Table View or open the thumbnail list results in Table View for more information. From here, you can drop the asset in the world.
To Drop an Asset in the World:
- Open the Asset Library.
- Search or filter to find what you need.
- To add an asset to your world from List View (default view):
- Click the asset thumbnail image to select.
- Click the location in the world where you want the asset placed. You can continue clicking to place multiple of the same asset.
- If needed, press ESC on your keyboard to deselect the asset and close the Asset Library.
- To add an asset to your world from Table View:
- Click Table View. Adjust your search terms if needed.
- In the Actions column, click
 Drop Asset. The Table View window will close.
 - Click the location in the world where you want the asset placed.
- The asset will appear where you clicked. You can move asset(s) by selecting and dragging one or multiple assets directly in the world or by changing the asset(s) X and Y coordinates.
After placing an asset, you can use Builder Mode tools to make changes to the asset like resizing, attach links, play video or audio, or create a teleport, portal, or Landmark Zone.
List View vs. Table View
When you open the Asset Library, by default you will see a List View of Placed Assets shown as thumbnail preview images. In this List View, you can change the dropdown to SchoolSpace Assets or My Assets and hover over the image to see the asset's name.
You can click Table View and see more information about each asset including a preview image and the asset name. Placed Assets, SchoolSpace Assets, and My Assets each have different information displayed when in Table View.
| Column | Description |
| Attached | Displays asset configurations like links, media, zones, or events. |
| Size | The dimensions of the asset in pixels. |
| Date Added | The date the asset was added to the world. Note: If you're using a scene, assets in that scene will show the date the asset was added to the original scene. |
| Actions | |
| Column | Description |
| Categories | Any tags for the asset. These appear as dropdown items in Filter by Category. |
| Actions | |
| Column | Description |
| Date | The date you uploaded the custom asset. |
| Actions | |