| This article explains how you can connect over video chat inside a SchoolSpace world and how to change your camera or microphone settings. |
SchoolSpace brings video chat to life with proximity-based interactions. When you walk up to someone in a SchoolSpace world, you will automatically connect over video chat. When you walk away, the connection fades and their video disappears. It feels more like interactions in real life!
Keep reading to learn how to:
![]() Stay Connected to a Group while Moving
Stay Connected to a Group while Moving
![]() Mute or Unmute your Microphone
Mute or Unmute your Microphone
Silent Mode: If you enter a world in Silent Mode, both video chat and text chat features will be turned off. You’ll see a message letting you know that these features will unlock once an admin joins the world.
Audio-Only Worlds: Some SchoolSpace worlds are set up to allow audio only. In these spaces, you can still talk to people by walking up to them, but the option to turn on your camera will be hidden.
 Start a Conversation by Walking up to Someone
In SchoolSpace, just move your avatar near another avatar to connect via audio and video chat. As you get close to someone, their video and audio will fade in. You can connect with up to 9 other people at the same time. When you're ready, walk away to leave the conversation.
- To move your avatar close to someone, either:
- Click with your mouse.
- Use your keyboard arrows or WASD keys.
- On mobile or touchscreen devices, tap the screen.
- When you get close, you will connect over video chat.
Are you having a great conversation with someone and want to stay connected? Send them a friend request!
The SchoolSpace team can increase the spatial video chat limit to up to 14 people. If your school would like to increase the number of people that connect over audio & video, reach out to support@schoolspace.io.
 Find People to Start a Conversation
To Find other People in the World:
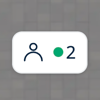
- Click the floating Users Menu
 button on the right side of your screen to open the Users Menu.
- Click the Current Users tab.
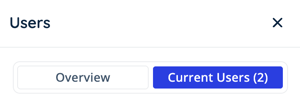
- To find a specific user, scroll the list, type their name in
 Filter, or click the dropdown to view users in different Landmark Zones.
 - Click
 Teleport under their name to move your avatar directly to their location.

If other users are in the world but outside your view, an arrow matching their avatar's color will indicate their direction.
 Stay Connected to a Group while Moving
Need to lead a group? Use the Follow feature:
- Hover over your own video and click
 Additional Options.
 - From the dropdown, select Send Invite to Follow.

- Anyone you are connected to over video chat will see an option to Start Following under your video tile.
Anyone who joins will automatically move with you around the world until they click away, click to Stop Follow, or you End the Follow.
 Mute or Unmute your Microphone
To mute or unmute yourself, click the ![]() microphone icon on your video tile.
microphone icon on your video tile.
If this is your first time in SchoolSpace, you will be prompted to grant permission to your microphone from the browser.
|
 |
| When your mic is on (unmuted), the mic icon will look like this. | When your mic is off (muted), the mic icon will look like this. |
 Turn Your Camera On or Off
To turn your camera on or off, hover over your own video tile and click the ![]() video icon.
video icon.
If this is your first time in SchoolSpace, you will be prompted to grant permission to your camera from the browser.
|
 |
| When your camera is on, the video icon will look like this. | When your camera is off, the video icon will look like this. |
If you accidentally declined browser permission to your camera or microphone, you can grant permission by clicking the settings icon in the URL bar and toggling on the camera and microphone permission. ![]()
 Update your Video or Audio Settings
You can find all of the video and audio settings inside Video Settings. To access these settings, click the Video Settings ![]() icon in the left sidebar.
icon in the left sidebar.
 |
In Video Settings, you can:
![]() Make all Video Tiles larger or smaller
Make all Video Tiles larger or smaller
![]() Change your Video or Audio Input
Change your Video or Audio Input
Reminder, if Silent Mode is currently on, the Video Settings icon will not be accessible.
Change Video Mode
SchoolSpace offers several video display modes that can be changed at any time.
- Click Video Settings in the left sidebar
- Under Mode, choose between Default, Presentation, Audio, and Low Bandwidth
 |
 |
| Default | Presentation |
| See up to 10 video tiles - 5 at the top, 5 at the bottom. You can change the position of your video tile or size of all video tiles. Great for casual chats. | One person’s video is large in the center and all other videos are smaller at the bottom of the screen. Great for viewing a screenshare or a lecture. |
 |
|
| Audio | Low Bandwidth |
| Hides the video of others. You’ll still hear their audio and your video can still be on. Great for exploring and seeing more of the world. | Audio-only mode, with your video off. When you are in this mode, it will use less of your internet bandwidth. Perfect if your internet connection is slow. |
Change Video Tile Position
In Default Mode, your video will initially be shown in the top middle of your screen. You can change the position of your video tile while in Default Mode.
- Click Video Settings
 in the left sidebar.
 - Under My Video Position, select an an option from the dropdown.

| Top Left | Top Center | Top Right | ||||
| Bottom Left | Bottom Center | Bottom Right | ||||
While in any video mode, you can make another person's video tile larger and centered in your screen by using Pin Video. This is helpful if someone is screensharing or giving a presentation.
To Pin a Video:
- Click
 Pin Video in either:
- The other person's video tile.
- The Current Users tab in the Users Menu .
- Their video will be made larger and be shown in the center of your screen, similar to Presentation Mode.
- If the person is screensharing, you can double click the pinned video to make it full screen.
- To close the pinned video either:
- Click
 in the upper right corner of the pinned video.
- Click
-
- Press the ESC key on your keyboard.
Make All Video Tiles Larger or Smaller
While in Default Mode, you can change the size of all the video tiles around your screen to see more of the world or focus on faces.
- Click Video Settings in the left sidebar.
- Under Video Scale, use the slider, arrows, or number field to increase or decrease the size of all video tiles.

The actual video size may not change depending on your screen dimensions.
Change your Video or Audio Input
You can select a different camera or microphone as needed.
- Click Video Settings in the left sidebar.
- In the Video Input or Audio Input dropdown, selected your preferred camera or microphone.

Change Video Background
By default, there will be no background selected. Choose from a selection of background images or blur your background before you enter the world or follow these steps to change from within the world.
- Click Video Settings in the left sidebar.
- Choose Blur, a background image, or None.
