| This article explains how to make announcements, share your screen, and record sessions in SchoolSpace. These tools help teachers and school leaders share important info, show presentations or videos, and keep a record of presentations, assemblies, or classes. It also explains who can use these tools, what they look like, and how to access saved recordings. |
SchoolSpace gives teachers and Moderators a variety of tools to communicate clearly and effectively in virtual worlds. In this article, we’ll cover:
![]()
![]() Tips for Broadcast or Spotlight
Tips for Broadcast or Spotlight
![]()
Making Announcements in Chat
The Everyone in World channel is an easy way to share text based announcements. Anyone with access to the Everyone in World channel can send a message. These messages will be visible to everyone in the world.
Use Everyone in World for:
- Sharing reminders (e.g. “We’ll be logging off in 5 minutes”)
- Giving casual announcements to all students in world
Tips for Chat Announcements:
- Students may miss the announcement if they’re not paying attention to chat, have notifications turned off, or have unread messages.
- Students banned from chat channels will see messages in Everyone in World but will not be able to send messages. Only Moderators can remove a ban. Each school has their own process for deciding when a ban will be removed.
If you do not see the Everyone in World channel, it may have been disabled in the world. Chat channels can be enabled or disabled by a Manager.
To Send a Message in a Chat Channel:
- Click the Messages
 icon in the left sidebar.
 - Click the chat channel you want to use (e.g. Everyone in the World).
- Type your message and press Enter or click Send
 .
.
Video Announcements, Lectures, or Presentations
Broadcast
Broadcast ![]() makes a user's video visible to everyone in the world or everyone in a private zone. Broadcast is a great way to make video announcements, share a presentation, or host a Q&A session. If you want to force the Broadcast video to be pinned and enlarged for everyone while also disabling avatar movement, you can use Spotlight.
makes a user's video visible to everyone in the world or everyone in a private zone. Broadcast is a great way to make video announcements, share a presentation, or host a Q&A session. If you want to force the Broadcast video to be pinned and enlarged for everyone while also disabling avatar movement, you can use Spotlight.
Students are not able to place their own video on Broadcast. Only Moderators or Managers can turn on Broadcast for themselves or individual students.
Types of Broadcast
| Broadcast - All | Share video and audio with all users in the world. |
| Broadcast - Private Zone | Share video and audio to everyone in a private zone. Only available when your avatar is inside a private zone. |
To Broadcast your Video:
- Click Broadcast
 in either:
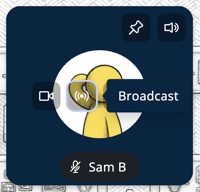
- Your video tile. You will need to hover over your video tile to see the Broadcast icon.
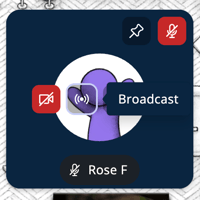
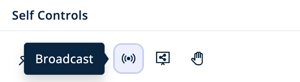
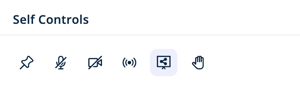
- The Self Controls section of the Overview tab in the Users Menu
 .
.
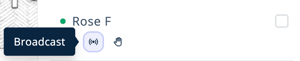
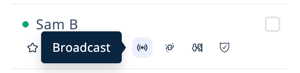
- Under your name in the Current Users tab in the Users Menu .
- Your video tile. You will need to hover over your video tile to see the Broadcast
- Choose:
- Turn on Broadcast - All to be seen and heard by everyone in the world.
- While in a Private Zone: Turn on Broadcast - Private Zone to be seen and heard by everyone with you in a private zone.
- You can also choose to record your broadcast.
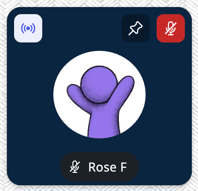
- When you start a Broadcast, you will receive a notification in the bottom right of your screen and a Broadcast icon will appear in the upper left corner of your video tile.
To Stop your Broadcast:
- Click the Broadcast
 icon in either:
- The upper left corner of your video tile.
- The Self Controls section of the Overview tab in the Users Menu and select Turn off Broadcast.
- The upper left corner of your video tile.
- When you stop your Broadcast, the Broadcast icon in the upper left corner of your video tile will disappear.
To Broadcast another User's Video:
- Click Broadcast in either:
- Their video tile. You will need to hover over their video tile to see the Broadcast icon.
- Under their name in the Current Users tab of the Users Menu .
- Their video tile. You will need to hover over their video tile to see the Broadcast
- Choose:
- Turn on Broadcast - All to make their video seen and heard by everyone in the world.
- While in a Private Zone: Turn on Broadcast - Private Zone to make their video seen and heard by everyone with them in a private zone.
- You can also choose to record the user's broadcast.
-
- When you start their Broadcast, you will see a notification in the bottom right of your screen and a Broadcast icon will appear in the upper left corner of their video tile.

To Stop another User's Broadcast:
- Click the Broadcast icon in either:
- The upper left corner of their video tile.
- Under their name in the Current Users tab of the Users Menu and select Turn off Broadcast.
- The upper left corner of their video tile.
- When you stop their Broadcast, the Broadcast icon in the upper left corner of their video tile will disappear.
Spotlight
Spotlight ![]() forces a user’s video into Presentation Mode for all other users. Spotlight is useful if you want a Broadcaster's video to be prominently displayed.
forces a user’s video into Presentation Mode for all other users. Spotlight is useful if you want a Broadcaster's video to be prominently displayed.
When a person's video is in Spotlight:
- Their video is set to Presentation mode for all users, expanding the Spotlight video to a large view pinned in the center of the screen.
- Their video is automatically set to Broadcast All.
- Other users cannot leave Presentation Mode or move their avatars.
- Only one user at a time can use Spotlight.
 |
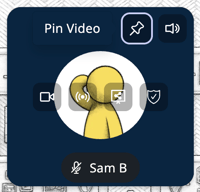
To Spotlight your Video:
- Click Pin
 in either:
- The upper right corner of your video tile.
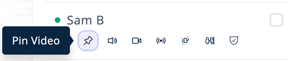
- The Self Controls section of the Overview tab in the Users Menu .
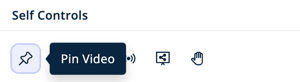
- Under your name in the Current Users tab in the Users Menu .
- Select
 Spotlight to start Broadcast All and place your video in Presentation Mode for all users.
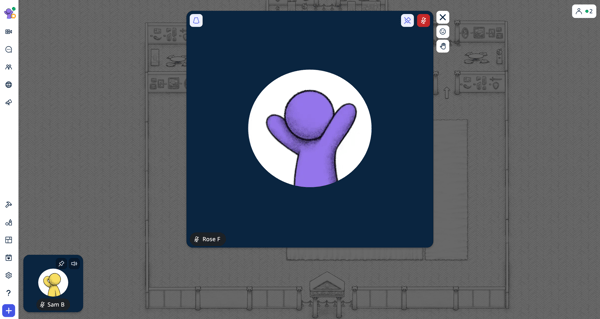
 - When you start a Spotlight, your video tile will be enlarged and pinned to the middle of the screen, a Spotlight icon will appear in the upper left corner of your video tile, and you will see a notification in the lower left corner of your screen.
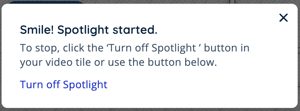
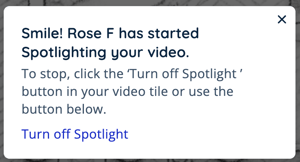
- Other users will see a notification informing them of your Spotlight, changes to avatar movement, and limits to other features.
To Stop your Spotlight:
- Click the Spotlight icon in the upper left corner of your video tile.
OR click the Pin icon and select Turn Off Spotlight from either:
- The Self Controls section in the Overview tab of the Users Menu .
- Under your name in the Current Users tab of the Users Menu .
- The Self Controls section in the Overview tab of the Users Menu
- When you stop your Spotlight, your video will return to it's normal size, you will see a notification confirming your Spotlight has ended, and your Broadcast will end.

To Spotlight another User's Video:
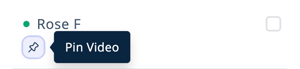
- Click Pin in either:
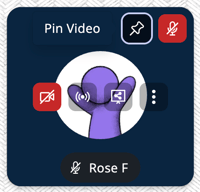
- The upper right corner of their video tile.
- Under their name in the Current Users tab of the Users Menu .
- Select Spotlight to start Broadcast All and place their video in Presentation Mode for all users.
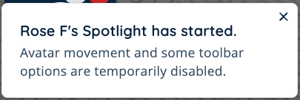
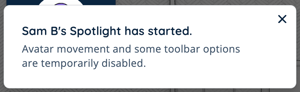
- When you start their Spotlight, their video tile will be enlarged and pinned to the middle of the screen, a Spotlight icon will appear in the upper left corner of their video tile, and the user will see a notification in the lower left corner of their screen confirming you are Spotlighting their video.
- You and all other users will also see a notification in the lower left corner of the screen confirming the Spotlight.
To Stop another User's Spotlight:
- Click either:
- The Spotlight icon in the upper left corner of the user's video tile.
- The Pin icon under their name in the Current Users tab of the Users Menu and select Turn Off Spotlight.
- The Spotlight
- When you stop their Spotlight, their video will return to it's normal size, you will see a notification confirming the Spotlight has ended, and the user's Broadcast will end.
Broadcast and Spotlight Tips
- For important or urgent announcements or presentations seen by the entire world, use Broadcast - All.
- To make the Broadcaster's video larger for everyone in the world, use Spotlight.
- For multiple separate but simultaneous announcements or presentations, use Broadcast - Private Zone within each Private Zone.
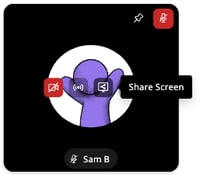
Sharing Your Screen
Screenshare ![]() makes your screen visible to people you are connected to over video chat. If you share your screen while Broadcasting, your screen will be visible to everyone who can see your Broadcast. You can share a tab, window, or your entire screen.
makes your screen visible to people you are connected to over video chat. If you share your screen while Broadcasting, your screen will be visible to everyone who can see your Broadcast. You can share a tab, window, or your entire screen.
Typically only Moderators and world admins can share their screen. In some worlds, students can request to share their screen. The ability for students to request to share their screen can be changed by schools.
Tips for Sharing your Screen:
- Use Tab sharing if you need to include audio (e.g. a YouTube video).
- Instruct users click Pin on your video tile to increase the size of the screenshare. After clicking Pin, they can double click to further increase the size.
- To force everyone in the world to see an expanded view of your screen, use Spotlight while sharing your screen.
To Share your Screen:
- Click the Share Screen
 icon in either:
- Your video tile. You will need to hover over your video tile to see the Share Screen
 icon.
icon.
- The Self Controls section of the Overview tab in the Users Menu .
- Your video tile. You will need to hover over your video tile to see the Share Screen
- Choose tab, window, or share your entire screen.
- If you want to share your audio, choose a tab and toggle 'Share tab audio' on.
- If you want to switch between multiple browser tabs, choose window.
- If you want to switch between multiple browser windows, choose entire screen.
- When Screenshare Access is set to Anyone in World or Request Access Only, non admin users (like students) can share or request to share their screen by following the steps above.
To Approve or Deny a Request to Screenshare:
- Click the Users Menu button on the right side of your screen.
- In the Overview tab, look for the Screenshare Requests section and choose:
 Grant Screenshare Permission to allow the user to share their screen. A two minute countdown will begin and they user will have to start their screenshare before the countdown ends.
 Deny Screenshare Permission to remove the user from the Screenshare Requests list and prevent them from sharing their screen.

Moderators can update the Screenshare Access setting to allow students to request to share their screen.
Recording in SchoolSpace
Record your lessons, presentations, or other activities directly in your SchoolSpace world! You can start a recording before or during a Broadcast, screenshare, or Spotlight. Only the video or screenshare of the person being recorded will be captured in a recording.
Recordings can be accessed in Dashboard by the following users:
- The user who started a recording.
- The user who was recorded.
- The world owner.
- A manager in a world.
Learn how to access recordings in Dashboard.
Students are not able to start a recording. Only Moderators or Managers can start recordings for themselves or other users.
To Record your Video:
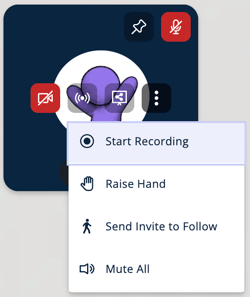
- Moderators can start a recording from either:
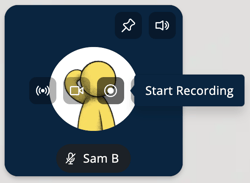
- Your video tile:
- Hover over your video tile and click Additional Options

- Select
 Start Recording.
- Hover over your video tile and click Additional Options
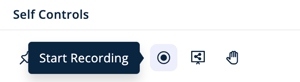
- The Overview tab of the Users Menu :
- In the Self Controls section, click Start Recording
- In the Self Controls section, click Start Recording
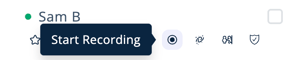
- The Current Users tab of the Users Menu :
- Under your name, click Start Recording
- Under your name, click Start Recording

- Your video tile:
- When your video is being recorded, you will see a new recording icon on your video tile, in the Self Controls section of the Overview tab in the Users Menu, and under your name in the Current Users tab of the Users Menu.
- To stop your recording, click the Recording icon in the upper left corner of your video tile.
Recordings less than 20 seconds will not be saved.
After 2 hours, the recording will automatically end and will be saved. You can start a new recording if you need to continue.
To Record another User's Video:
- Moderators can start recording another user's video from either:
- The other user's video tile:
- Hover over their video tile and click Start Recording .
- If you do not see the Start Recording icon on their video tile, click Additional Options and select Start Recording.
- Hover over their video tile and click Start Recording
- The Current Users tab of the Users Menu :
- Under their name, click Start Recording
- Under their name, click Start Recording
- The other user's video tile:
- When their video is being recorded, you will see a new recording icon in the upper left corner of their video tile and under their name in the Current Users tab in the Users Menu .
- To stop their recording, click either:
- The Recording icon in the upper left corner of the user's video tile.
- Stop Recording under the user's name in the Current Users tab of the Users Menu .
- The Recording
Recordings less than 20 seconds will not be saved.
After 2 hours, the recording will automatically end and will be saved. You can start a new recording if you need to continue.